Saturday 26 December 2015

Kärshult cushion complete.

This post is a version of the explanation that goes with the cushion as it was a gift for some very kind friends.

When we were at the summer house in May I was inspired to create a quilt. Quilts are, however, long in the making. That first spark of an idea needs time to develop in the back of my brain.  And once I decide on colours and themes and select the fabric there then follows the actual sewing and quilting. It’s not instant gratification at all!

I’m pleased to say the quilt is done. You can see them in this blog also.

 We had a wonderful time at the summer house and because of that I also wanted to create a smaller version for the summer house. So you will see there is a cushion. I thought you might like an explanation of the colours and design I used.


This side of the cushion is a Log Cabin block chosen, as you might have guessed, in honour of the summer house. The Log Cabin block is an old design, it is found as a design on the clothes of Egyptian mummies! It was made popular during the American civil war as a symbol of the pioneering spirit. It consists of strips of fabric sewing around a central square. Traditionally the central square is red or orange to represent the hearth of the home. I was inspired by the fire in the house.


The surrounding strips are traditionally arranged with the lighter colours on one side, this is the side of the house in the sunlight, and the darker colours on the other, the part of the house in shade.

The light green is the moss in the forest, the darker green the trees, the brown is for a moose we saw and the yellow in the inside of the small flowers that grow all around. I looked them up and in English they are called wood anemones. The pure white is the petals of the wood anemones, the patterned white the bark of the birch trees and the light blue the colour of the lakes. You will see on the quilt I made a colour change; I swapped the yellow for a mid blue. That blue was the colour of the sky one evening just at dusk. I used it for the quilt as I felt it represented what I wanted to show better in that format. For the cushion the yellow worked best.

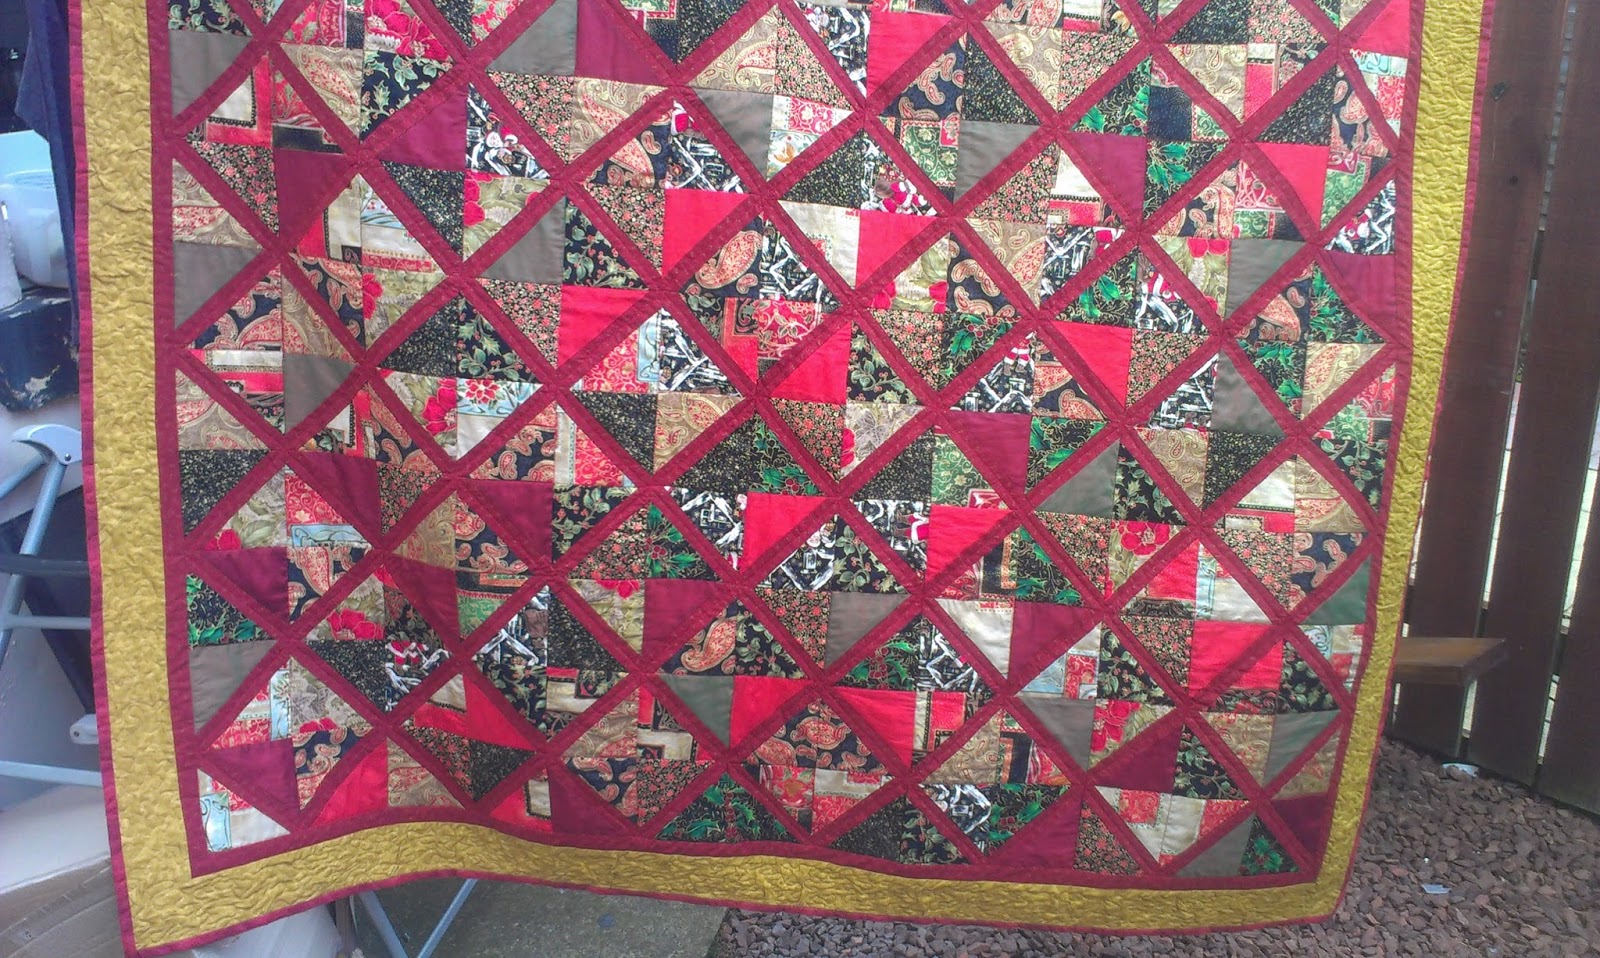
Log Cabin blocks are arranged in many different ways when sewing up a quilt. You can see from mine I sewed four blocks together to create a star shape. That design is called Starry Night and I chose that to remember a night we went outside to look at the stars. It was beautiful. Of course there is just one block in the cushion so I couldn’t create a further design that way. I did quilt a radiating design on the darker side (as I also did on the quilt) for the twinkling stars.


On the other side of the cushion I used the blue sky fabric and created a different design. The white triangles are called flying geese units. You will see they are also on the quilt in different colours used as a border on two sides. On the last day we were at the house I sat outside thinking quilt thoughts (as I often do) and pondered what I could use as a border. As I sat a pair of geese flew over the house. As if by magic

Hopefully this cushion will find its way to Sweden and live its days in the summer house. 

Tuesday 22 December 2015

Coasters.

I have eventually settled on a coaster method that I like. It is very basic but it seems to produce good results and is fairly quick to do.


In this picture I have the coasters arranged on a Christmas Table Runner I made from the same fabric. 

To make them I cut a square of fabric 6 inches by 6 inches. I then cut a piece of wadding the same size and quilted the fabric to the wadding. In these examples I only used straight line quilting however my plan is to try free motion quilting when I make some non-Christmas ones. Just to try it.

Once the quilting was done I trimmed them to five and a half by five and a half inch squares. I then cut squares of the same size in the backing fabric (though they are reversible). I pinned the backing fabric to the quilted square, right sides together. Then I sewed a quarter inch from the edges all around, leaving a small gap to turn inside out. Trim the corners then turn right side. 

Sew an eighth inch around all 4 sides. This tidies it up and also closes the gap I left to pull it the right way. My only negative was I don't like the finishing off of this last stitching. It looks a bit ugly on such a small piece if I sew back stitches at the start and finish. While it didn't bother me as much for these as they are just fun Christmas coasters I think it will bother me for any others so next time I will try finishing them off by not back stitching but burying the knot in the layers. I know it will be more time consuming but it will make me happier.

These can be made in any size of course and the same method used for placemats.  

Kärshult. Complete.

My Kärshult quilt is now complete. Hans very kindly took me to Roker beach to take photographs of it.


I like it more than I thought I would. Originally the colours weren't as pleasing to me as I would have liked. This was due to them being more inspired by the situation than being what I would have chosen myself. I do think they come together quite well though. I especially like the flying geese, which is strange as I disliked doing them at first. 


I learned so much from this quilt. Mainly that it is much more difficult than I thought to manoeuvre a quilt of that size through a small machine. Yes it is doable but it can be frustrating. I think if I had been more proficient it would have been less tricksy. So I'm going to give the quilt as you go method a try for my next project. Or something small and manageable so I learn the skills I need. It's not easy to learn to quilt on a large project. 

I would also like to do more free motion quilting but again it was outside my skill level on such a large piece. Having said that I do love straight line quilting. I'm very pleased with what I achieved. 


 The quilting enhances the starry night pattern. I just stitched in the ditch with the flying geese units. The white borders have straight lines also. 


All in all it was very successful and the quilt is now on my bed. 

Saturday 28 November 2015

Kärshult cushion

When I was in the house in Sweden I was inspired to make a quilt. I also wanted to make something to give to the house as a gift. Making a second quilt would have taken too long (it's been 7 months since we were there and the first quilt is not finished) so I decided to make a quilted cushion cover. Originally I wanted to use one of the log cabin blocks from the quilt but when I was experimenting with the colours I made a block that I knew wouldn't work in the actual quilt but which would be great for the cushion. The difference is only in the main quilt the central colour is dark blue whereas in this block it is yellow.


I've quilted in the same way as the main quilt with straight lines. I'm quite pleased with it. I did originally want the other side to be plain with perhaps an envelope opening but on reflection I'm going to make it reversible. I want to have flying geese and the dark blue fabric in the cushion to represent the weekend as it was for me.

Kärshult. Quilting.

I've made an effort to get the quilting complete on this project. The issue is it's so large manipulating it through the small harp space of my machine is a pain. And because I can't move it about I have had to stay with straight line quilting and many, many thread breaks. It was frustrating at first so I only did a little at a time however I'm now in a routine with it so it's not too bad.


There are 6 of these sections, each with 4 log cabin blocks. In the dark section I have quilted radiating lines from the point of the dark green to points at the ends of the strips (11 lines in total each log cabin block). This is to represent the rays of light/star light as it's a starry night block formation.  In the light sections I have quilted 2 parallel lines in each strip. I've also tried to stitch in the ditch where possible however the high number of thread breaks is bad enough giving myself more. So apologies to Cindy Needham, who always does this and whom I respect deeply for her wonderful quilting knowledge, but I would have grown to hate the quilt if I'd had to do any more thread breaks.

I have 2 of these sections complete and another started. There is light at the end of the tunnel! All the other quilting is done (borders/flying geese) so when the log cabin sections are complete I'll have the binding and label to do.

It has been an interesting project. My family like it best of the quilts I have done so far. And I have learned so much. The most important being I will be doing quilt as you go or smaller quilts from now on.

Monday 2 November 2015

Kärshult. Quilt top.

I've completed the quilt top. In the end I didn't use the yellow fabric. It just didn't seem to fit anywhere. It's not a huge problem as I really just chose it thinking I needed another light colour but it was too bright to be light. 


I was pleased with how the flying geese turned out. They were a bit of a pain to master (I still haven't got the hang of the Fons and Porter ruler) but they look better than I thought they would in the quilt.


I know it looks as if they are sewn in strips along the length of the quilt but due to the shape of it I'm going to have it lie across the bed with the flying geese at the head and foot. It's too long to lie the other way.

So much for quilt as you go! It's huge. I think I was nervous about the QAYG method. It's not something I have done before and I didn't want to spoil this quilt making a mess of it all. I am going to try that method but will start with something smaller and more experimental. So as I completed every part of this quilt I just kept sewing them together as that's what I am familiar with.

Because of this I've decided not to free motion quilt. It's just too large to manoeuvre through the machine when I'm not confident to begin with. I'm going to use my walking foot and straight line quilt. Like the QAYG I'm going to attempt FMQing with a smaller project. No need to make my life even more complicated. Quilting is supposed to be fun. 


Thursday 22 October 2015

Kärshult. Flying geese.

I decided only to have flying geese on two sides of the quilt (the shorter sides) as it's going to be too big with all the borders. Calculating the measurements worked out I needed 48 flying geese units on each side.

It's been a bit of a pain with them as I bought a Fons and Porter flying geese ruler but just couldn't get nice, flat blocks when I used it. So I used the method whereby you cut a rectangle and 2 squares (see previous post)

 
I have used the light and dark greens, the brown, the light and the dark blue and the orange. The geese part is the white on white fabric. I didn't use the yellow as that will be my border.


They still aren't super flat but I'm happier with them than my first lot.

I also had a think about how I want to quilt the blocks. I originally wanted a quilt as you go method; so doing each log cabin 4 square block individually then sewing them together and then adding the borders. Eventually I decided against it as the reason I wanted QAYG was to help with the free motion quilting but I just didn't like the idea of piecing all those blocks together.

I have decided to sew all six log cabin squares together with sashing (the white on white fabric) also putting a sashing border around the circumference of all the blocks. I'll then make up the quilt sandwich, quilt, then do the borders at the end. I may regret it but that's my current plan.

I love the backing fabric I have. It's a lovely blue and busy enough to hide my inevitable fmq errors.


Small Hexagon Quilt

I must think of a better name for this quilt.

I'm getting on quite well. I do enjoy the hand sewing. It's very relaxing to watch TV or a Craftsy class and sew the pieces together.

Here is where I am at with it:


The top row is half completed and I turned it wrong side round to show the paper hexagons.

Fan design scarf

I began this scarf some months ago made from Hjertegarn Kunstgarn, in the Rainbow shade. I bought the wool from Harbour Yarns Seaham and thought it would be perfect for a scarf. I've been doing it as my watch the TV/in the car project. I used up the ball I bought but wasn't happy with the length so bought another ball.
 
I used a fan lace pattern and crocheted extra fans to each end to make it look prettier. The finished scarf is 190cm so it's long enough to double up and knot the way I wanted.

Wednesday 21 October 2015

Small hexagon quilt

I started this quilt a while ago after buying some fabric from High Street Quilting. They were in those lovely baskets with juicy bits and pieces you find in fabric shops. I can never resist. At the time I had no ideas or thoughts about what they could become.

That same day I bought a Quilt Now magazine and, by lucky chance, there was a free gift of 250 1 inch hexagon papers. If that's not fate I don't know what is. So I had the idea of making lots of small hexagons in each of the three fabrics and arranging them in a swirling pattern. Sort of more concentrated at the bottom and diffusing out nearer the top. The filler will be white hexagons.

I took it to Denmark when we were there in September and it was very pleasant to sit outside the hotel room in looking out over the Præstø Fjord and sew. The weather was beautiful too. 


EPP is ideal for taking with you as you are out and about, I sew in the car on the way to work sometimes. I'm not sure how many of each colour I have but here are the three lots I sewed up. I also made some white fabric hexagons.


My idea is to have the hexagons 'floating' upwards from an area more concentrated at the base and diluting with white hexagons as they go upwards. I arranged them on a white background to get the shape I wanted.


Once I was happyish with this layout I marked each paper hexagon with a row letter and a place number. So B5 or N12. I gathered them up into piles of rows and clipped them together.


The next step is to sew each row together in the right order then sew all the rows to each other.


Sunday 11 October 2015

Kärshult. Sewing the log cabin blocks.

In my last post about this quilt I said I'd take a photo of one of the log cabin blocks with the blue strips but of course I forgot. And now they are all sewn up together in the larger blocks. No matter. You can still get the gist from this final photo:


So this is four of the log cabin blocks sewn together. Each block was 14.5 inches square, so slightly larger than they should have been. I think I was a bit sparse with my seam allowances. Live and learn. The four blocks sewn together are just short of 29 inches square.

I'll be quilting each 4-block as I go. The designs of with I'm still debating.

The plan is to have them in two rows of three. It's going to be much bigger than I thought it would be though. I've the borders to add now.

The plan with them is to have three borders: the yellow fabric, a flying geese border and a white on white fabric border. My calculations for the sizes are approximately:

Top and bottom borders
- yellow [56 inches x 3.5 inches] x 2
- flying geese [56 inches x 3.5 inches] x 2
- white on white [56 inches x 3.5 inches] x 2

Side borders
- yellow [ 93 inches x 3.5 inches] x 2
- flying geese [93 inches x 3.5 inches] x 2
- white on white [93 inches x 3.5 inches] x 2

I calculated I'd need the 1.5 x 3 inch triangles on the Fons and Porter Flying Geese ruler I bought. That will be the right width but I'm not sure how many I will need to make for the length. I'll just need to sew them up and see.

Plan is to sew the borders together so they fit the Log Cabin centre then do the quilting.

Saturday 3 October 2015

Plarn Shopper


I haven’t been making a note of this project step by step as I started it ages ago. It’s also not on my list of projects as they are all sewing projects and this is crochet (oh yes, I have a separate list of crochet projects!).

My original inspiration was twofold. Firstly I had a huge tangled pile of carrier bags in a cupboard. Secondly I didn’t want to have to pay for carriers when the charge comes in (which is this week I think) so I’ve been collecting bigger shopping bags. I found instructions for making plarn. There are several Youtube clips showing how to do this. Basically you flatten out a carrier bag (the thinner types are best) then fold them up length ways and cut strips. The strips open out into loops which you join together to make plarn (plastic yarn). That is then rolled into a ball and then crocheted like normal yarn. I used a size 5 crochet hook.


I sorted the bags into types so this bag is Tesco and Sainsbury’s. 


Kärshult. Cutting out the strips.

I have cut out all of my strips. They are each 2 inches wide. I used the Log Cabin ruler designed by Marti Michell to do this. I don’t enjoy cutting out fabric at all so the ruler made a bad job slightly less tortuous.


Previously I cut out some test strips just to see what it would look like. I used the yellow fabric on the dark side of the block as the outer strips but when I sewed it up I wasn’t happy with it. The colour wasn’t dark enough; it’s more of a medium tone. Here’s what it looks like:


It looks huge in that photo but is actually approximately 13 by 13 inches.


This time instead of cutting yellow strips I cut the dark blue that I put to one side to use as a border round all the log cabin blocks. I like that much better. I’ll post a pic of it later.

Tuesday 29 September 2015

Kärshult


In May 2015 Hans and I stayed in a summer house in Sweden at a place called Kärshult (pronounced  Shashult). We stayed there with Hans’s family and it was a wonderful holiday. While I was there I was inspired to make a quilt so this is the start of that project. I’ll also be doing the same as I did with my Christmas quilt and record the time is takes to make it.

I’d already made some notes so I’ll include any which are relevant in this first post. The quilt itself will be a combination of designs. I have the idea of what I want it to include but am happy if it evolves differently. That’s part of the fun.

My initial inspiration was to have Log cabin blocks. The house was made of wood and so is a log cabin. This this the central part of the whole design. I’m not 100% certain what size blocks I will do. I have bought some Log Cabin rulers and have an option of 4 sizes. I think I’m going to go for the larger size to reduce the number of seams. That will make the quilting part easier. I’ll be arranging them in a starry night formation. This is because one night we stood outside and looked up into the sky and saw the magnificent stars. As there was very little light pollution the sky was twinkling with lights.

I pondered the design all the time I was there. On the last day I sat outside on my own. At this point I knew I wanted the log cabin blocks in a starry night grouping but I needed a border. At that very moment there was a squawk overhead and, when I looked up, I saw two geese flying over the house. If this was in a book or a film I’d groan with the cliché but it actually happened. So flying geese as the border it is!

I also want to include some applique but as yet I’m not sure of the designs. I have some ideas (Danish and Swedish flags/hearts) but this is something I’ll be more certain about when the quilt takes shape.
I’m also going to do this as a quilt as you go project. Probably sewing each starry night block (so four log cabin blocks) together then quilting these. I’m not certain about that though so let’s see.

I took many photographs and selected those which inspired me the most. Finding fabric was a little problematic as at the point I hadn’t located High Street Quilting at Birtley so I have purchased it from the internet. That said I am happy with my choices. I have matched up a photograph with each fabric but in some cases it is less what the photograph shows and more my recollection of the item I want to represent in the quilt.

The heart of each log cabin block is the central square to represent the hearth of the home. The house actually did have wood burning fires which was very cosy and atmospheric, The room Hans and I spelt in had a beautiful fire and it was especially romantic to turn off the lights and lie in the dark watching the red and orange flames.


The light half of the log cabin blocks will have less of a variety of fabric (mainly as there were less things that were light) so I’ll be using each one more than once in each block.

There were beautiful white flowers everywhere. When I came back I looked them up and they are called Wood Anemone (Anemone nemorosa). I have a pure white fabric as their petals.


In the area we stayed there were many silver birch trees. I tried to find a fabric that represented the colour of the bark but all the silver fabric I looked at was too silvery. I decided to use a white fabric with a white leafy pattern which I think I’ll also use for borders as it has a leafy/foresty theme.


Dotted in amongst the trees were large and small lakes. They were almost all a pale blue colour. Quite delicate and light.


So these three will make up the light section of the log cabin blocks.

The darker half will have five colours.

I have no photo for sky as I am representing it on the quilt. It was just before dusk and the sky was a dark blue colour.


Hans has told me many stories of the times he spent at the house. One of those stories told of a moose who wandered near the house one year. I said I’d love to see a moose too but he told me it was rare and in all the times he had been to the house moose were rarely seen. On the drive to the house we told Sara and Michael I wanted to see a moose and again I was told they are shy, reclusive creatures who hide away. Then out of the woods appeared a moose. Just a few metres away! It stood for a while and watched us. We got out of the car and took photos. It was quite unconcerned. So I’m using a brown fabric for the moose.


As it was a forest I wanted to represent the trees so have a darker green for the pines.


All around, on rocks and the trees, was a very pretty moss. It gave the whole forest a fairy tale atmosphere.


The lovely Wood Anemones had bright yellow stamen which stood out against the white of the petals. I wanted that colour too.


So these are my five dark colours. 

Monday 28 September 2015

Things to do

I've completed one of my Things to Do:

Completed 28th September 2015. Peter’s cushion. I used a cushion pad I already had and sewed up some dark blue and white stripy fabric. I'll mark the items I have completed with an * in the original post.

Thursday 24 September 2015

Things to do


­I have a list of sewing projects I want to do at some point. They include:

  • Sweden quilt. This is my next big project. I have all the fabric and will be starting as soon as we get back from Denmark.
  • Zipped fabric bags. On the internet there are a gazillion tutorials for these bags and they are usually called pouches. Ugh. I hate the word pouches. I call them bags. None of the tutorials are quite what I want though so I’ve been tweaking. I want to do several types/sizes to fit around whatever is needed.
  • Appliqué. I’ve always thought it looks lovely and adds something extra to a project. I attempted some on my Christmas quilt and loved it. I found it very satisfying.
  • Peg holder. I’m actually in two minds about this one. I decided to learn how to make them when my own peg bag gave up and died. Since then I’ve been keeping my pegs in a plastic jug and in that time I’ve grown quite fond of that jug. It serves its purpose well and I have no complaints. So now the peg bag is on my list less out of necessity and just because I want to say I can make one.
  • Small hexagon quilt. And when I say small hexagon I mean it. I got some free, tiny, paper templates with a magazine and have the idea to do a lap quilt with lots of white negative space and the small hexagons scattered across that space. I have green/blue and mustard coloured fabric picked out for it so sort of have the idea there.
  • Bright blue quilt. This one will be super modern in design. I bought some bright turquoise fabric and again want lots of negative space but with patches of different sized squares in some areas. Again I know the design in my head. I also want to have a quilted back as opposed to one piece of backing fabric.
  • Placemats and coasters in the 1718 quilt design. I have practiced making Christmas coasters and placemats using cheap poly-cotton fabric. I now have an idea of what they need to be sewn like. I want to make some good quality ones too. I saw the copy of the 1718 quilt at the Quilt Museum in York and bought the book that has the patterns. I have an idea to have some of the designs on placemats and coasters in good quality fabric.
  • Nisse placemats and coasters. I need to make 3 sets of these for Michael’s children. I have the Nisse fabric so just need to find something in red that is suitable to edge them.
  • Tile Quilt. This is inspired from the shop doorway in Sunderland. I have always admired the tiles and want to make a quilt inspired by them. I’m not that keen on the colours though so it won’t be an exact copy.
  • Hexagon quilt. This is the first one I started a few years ago. It’s from a book and is EPP. I have all the hand sewing done so just need to join the pieces up and quilt. It is huge though so I want to quilt as you go in smaller pieces then join.
  • *Peter’s cushion. This is such a small job but I have been putting it off. I couldn’t find the fabric for it but recently it appeared again so I’m aiming to do this one first before all the others.
  • Bookmarks. Just sew a few to have as spares for when needed. I might also use them to practice appliqué.
  • Clear front bags. I saw a pattern for these in a magazine and loved them. They are ideal for holidays as you can see everything inside them.
  • Drawstring bags. These will be of 2 types. Type 1 will be your normal, round bottomed drawstring bag (though it’s trickier that you would think to find a good pattern so I’m thinking of testing out some ideas to get the one I want). Type 2 will have a crocheted outer part that covers the bottom and halfway to ¾ of the way up. The rest will be fabric and it will have a fabric lining. I looked on the internet for drawstring and it’s very disappointing. Cheap looking and boring colours. So I have bought a lucet and will be making my own.
  • Laundry/clothes bags. Again they will be drawstring but won’t have round bottoms. They are to put underwear etc in when travelling and also one for dirty clothes.

Wow. Fifteen things. I’d better get a move on

Wednesday 23 September 2015

Christmas lattice Quilt. Part 7.

I’m finished the Christmas quilt. This will be a long post as there were quite a few small but fiddly steps so I’ll include them all here.

I finally managed to finish the FMQ on the border. It went much better than before and even though I wasn’t 100% happy with the results (when am I ever?) I can live with it. I then sewed on the binding.


I wanted to do a quilt label that matched the theme of the quilt. This is probably something I’ll try to do for each of them. For this quilt I planned to do the label in a pale cream fabric with a border in the backing fabric. I wanted the border to blend into the quilt as my plan was to appliqué gold stars onto it. I have ever done appliqué before so more on that later.

First I cut out the label pieces.


I then sewed the border pieces to the label.


Then came the applique part. As always I read up about it and looked at the different methods. The one that looked the easiest was where you iron interfacing to the shape then machine stitch around the edge. That didn’t appeal to me as much though as the photos of examples looked a little clumsy and as I knew I wasn’t going to be great at it I didn’t want to have clumsy as my aim. So I decided to do the technique where you cut out the shape in freezer paper and iron it to the wrong side of the fabric.


From what I read it was advised to leave a ¼ inch seam allowance but when I did this it was too fiddly for me to manage so I cut a larger seam allowance. Hopefully I’ll improve with practice.

There are then differing ways to tackle the next step. Some people trace the line of the shape onto the fabric then either finger press, or just turn with the needle, and sew to the background fabric. I tried this but again it was too tricky for my novice ability. I preferred the method whereby you press the edges over to have a cleanly defined line.


I then sewed the stars to the label with small stitches. I love this! I’m definitely going to do more appliqué. It’s just the right amount of hand stitching for me. Something I can do while watching the TV or on the go.

I wrote my label and made a mistake. I spelled Christmas wrong (Christmass L). In my defence I was tired. I also started sewing it to the quilt back and it was wonky so I left it and went to bed. This morning I had another go and transformed the mistake into holly and sewed it on straight.


All through the project I have been doing my best to remember to record how long I spent working on the quilt. I added it all up last night and it was 43 hours. I’m actually pleased with that. Not too bad really.

And here is the finished result.