Sunday, 19 July 2015

Craft: Quilting: Bird Quilt. Part 7

The Bird Quilt is complete. Here is a photo of it:


I'm quite pleased though there are a couple of issues. I'm not going to say what they are, or even think about them though as Comparison is the Thief of Joy. It's the best Bird Quilt I have even made!

I decided to bind it with the same fabric as the back.


And I added a label when I was finished.


I will be changing how I do the labels though. I looked at a few places to check how it was done (freezer paper template) but even with the lace around it looks a bit dull. So I am going to try a more patchworky way. Maybe add a few strips or some hexagons. I have to add a label the the charm suare quilt I made so will see what I can come up with.

Just as a note about hand quilting though; I didn't enjoy it as much as I had hoped (I usually enjoy hand sewing very much) but maybe it was the size of the project. I wanted to record the needles I used, after much swapping about and trying different ones, were Sharps size 10. They were the best length for me (I hated those tiny little between types) and were just the right amount of bendy to manipulate in the fabric.

Friday, 19 June 2015

Craft: Quilting: Bird Quilt. Part 6.

I'm still hand quilting my Bird Quilt. It takes some time as I am not great at hand quilting so am learning as I go. Also I would imagine even if you are an expert it's still quite a slow job. I am not finding it tedious though so all is good.

I wanted to mention the technique I am using. I read lots about hand quilting and looked up videos on the interwebs so knew the most popular method seems to be the 'rocking' motion way of doing things. Sewing in vertical line from north to south, thimble holding the end of the needle and fingers of the other hand underneath the quilt. I have tried and just can't get the hang of this way. I tried with a hoop and without. Different thimbles, different needles. It was not pretty.

After much experimenting I have found I am quite satisfied quilting with an ordinary needle, a longish one, as if I hold the end I can get lots of stitches in one go. Those tiny little needles recommended for quilting don't suit me at all. I don't use a hoop. Instead I rock the fabric rather than the needle, though actually I turn both. So I rock the needle back and forth and manipulate the fabric. I find I get my stitches as neat as I can that way. Finally the saga of thimbles. Who knew they were so problematic. In an ideal world I wouldn't use one at all. It's much easier without, but the tip of my middle finger was looking, and feeling, sore. It's no fun when the end of the needle goes through flesh. I have found I'm best using a Roxette thimble. I still haven't found a way to stop the needle going too far through the quilt before bringing in back up again other than hitting my nail. Yes my nail is looking a bit sad but my stitches are small!.

Here are photos of 2 of the panels I've completed:


Monday, 25 May 2015

Craft: Quilting: Bird Quilt. Part 5

I've been steadily progressing with my Bird Quilt but realised I hadn't taken any photos lately. So here's where I am:


I've stitched in the ditch everywhere I need to. I also attempted some free motion quilting which is so hard! All the books advise to practise first but I'm rubbish at that. I like just to get started and see where I go. Also no matter how much I practise I always seem to go back to where I was when I started when I get to the proper piece I'm working on. So I skipped the middle step.


Is it the best free motion quilting ever? Nope. But remembering that Comparison is the Thief of Joy I am proud to say it is the best free motion quilting I have ever done. You can also see I have quilted a line all around the outside border to tidy that up.

The panels themselves are progressing nicely too. I started with the metallic threads Peter got me for Mother's Day. I'm not using them on every panel and some panels have just a tiny amount but I'm liking the effect. I won't be using this quilt for a bed or daily use so I can afford to be fancier with it.


I'm also attempting to hand quilt. Again all the books and tutorials give great advice. I have watched lots of videos where someone sits with their work in a hoop, between needle and thimble all in place then they do the rocking back and forth motion to make tiny, neat stitches. I have tried and tried with this and all I get are ugly stitches that don't even go through all the layers. It saddened me.

Then I saw a lady who hand quilts without a hoop. And who doesn't do the rocking back and forth motion with the needle but who bends the fabric into the right place. It was like a lightbulb switching on for me. Why on earth try to bend a needle when you can bend fabric? Perhaps the end result isn't as neat (and certainly my end result wasn't perfect) but it's so much easier. I managed to quilt which even stitches that went through all 3 layers. Success in my eyes. I'm going to try this method for this quilt and see if I improve.


I'm not sure how well it shows up but in this panel I have quilted the nest with gold thread and round some of the leaves, the trunks and the bird with hand quilting thread. Again is it perfect? No. Is it the best I have done so far? Yes!!!

Christmas Lattice Quilt: Part 1

For a while now I have been toying with the idea of making a Christmas quilt. My idea was to make something to put on our bed in December, or even just have downstairs on the settee. Yesterday I was watching some of the fantastic tutorials by Jenny Doan from the Missouri Star Quilt Co. One in particular caught my eye as being perfect for a Christmas quilt: The Lattice Quilt.
 
Inspired I sent for 4 charm packs of Fabric Freedoms Art Noveau Collection Christmas. I looked at a few different charm packs but liked this one best as it is a little bit more grown up and artistic. It has some gold in it and at this very early stage I have the idea of having a gold binding to the quilt but I'll make that decision one it's made up.


I'm going to wait until the fabric arrives to make the final decision about what colour to do the lattices. Again in my mind I have the idea for a lovely, Christmassy red but want to see all the squares first. Once I decide on that I can buy threads at the same time. Hopefully once all that arrives my Bird Quilt will be done and I won't be working on 3 quilts at the same time.
 
To do:
1. look at fabrics in charm pack to decide on colour of lattice fabric
2. buy matching thread.


Tuesday, 19 May 2015

Craft: Sewing: Blue Curtains

These were a quick project, well compared the quilts they were. I bought the fabric from Textiles Francais  (be warned, do NOT press to go to that link if you have a fabric addiction!). It is called Toile de Jouy Fabric | Aimee and is glorious though I made a bit of a mistake and didn't order enough so had to insert a length of cream cotton and lace to lengthen it, which will you will see in the photos.


So this is the fabric though it needs a bit of an iron here.


I hemmed the bottom of each curtain.


It was after I did the hemming that I realised I hadn't bought enough fabric so I found some lace and cotton fabric to add a piece in. I cut the curtains about 1/3 from the bottom and inserted the lacy bit. I tried, and was successful, doing a flat fell seam for the first time.


I did this at both ends of the lacey piece. This made the curtains the right length. I added curtain tape and then got Peter and Hans to put them up for me.
 
And here they are:


I love that last photo particularly as it shows my lovely sewing table. I could happily sit there all day. 


Tuesday, 12 May 2015

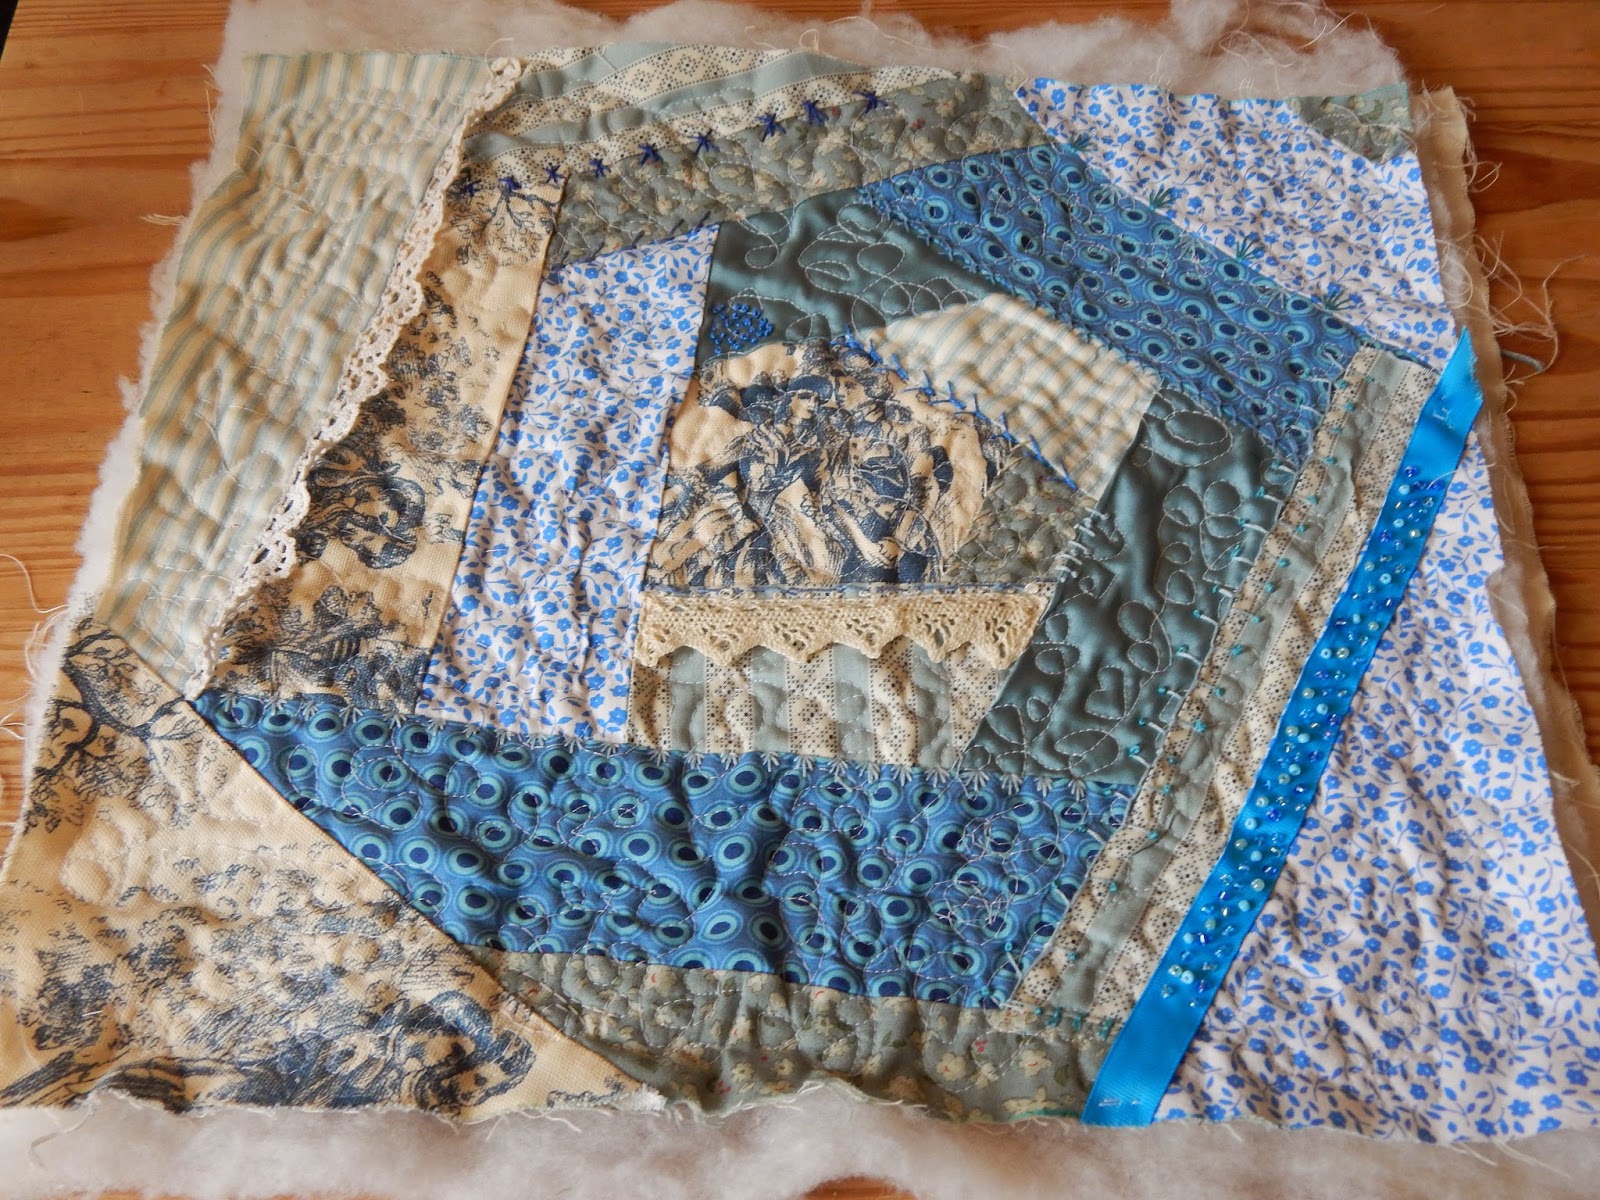
Craft: Quilting: Blue cushion.

I made some curtains for our bedroom (I will post pictures soon) and wanted to make a cushion to match. I thought it would be a good idea to make it using the crazy patchwork method as that's something I want to learn to do and as the cushion will only be seen by us I could relax if I make mistakes.
 
I began by fussy cutting out a central shape choosing one of the motifs from the curtain fabric.  I used my Simplicity EZ Quilting Simply Crazy Template which I didn't 100% understand the purpose of when  I bought it on a whim but now I see it's good to have an irregular sided shape for the central piece.I pinned my central shape to a square of cream cotton then sewed a strip of another fabric to it. I had marked the dimensions of the cushion onto the cotton.


 I continued in this way going round and round the central motif.


Once it covered the cotton fabric I trimmed it to be the correct size (40cm by 40cm).


From there I made the quilt sandwich and pinned all the layers together.


I then attempted free motion quilting. I'd like to say I did a loop style but in reality it was chaos. It's an odd feeling as I feel panic and fear when I do it. Everything speeds up and goes a little out of control. I'm not that happy with the quilting as I did the loops too close together so it looks crinkly but it looks better in the flesh (in the fabric?) than in a photo so all is not lost. Also it went better than my first attempt so all's good.


I'm currently embroidering the joins. It's slow going as I'm learning the stitches and I haven't got a hoop that fits the piece with the wadding. I'm not in a hurry though.


I also used one of the pieces of lace that Mam gave me as a trim. I'm going to use a piece if I can when I make something for home. In this cushion I sewed a strip of cream lace along a seam on the left side.


Once all the lace and embroidery was done I sewed the front to a piece of backing fabric with a length of blue piping in between. It's now finished and looks like this:


Sunday, 19 April 2015

Craft: Quilting: Bird Qilt: Part 4

I sewed the piano key strips to the bird panels, one strip at each side. This, as I mentioned previously, was to widen the quilt as I felt it was too long and narrow. I tried to use colours which complimented the colours in the panels.


I then added a border of the blue/grey flower fabric. Same one I used for cornerstones. It was then time to make the quilt sandwich. I struggle with this as it's tricksy getting the layers to stay flat and not bunch up. This is not a huge quilt though so managed sort of to my satisfaction. I taped the backing fabric to the table which helped though next time I will pull it tighter. I've also bought some large clips to try.


I ironed it again and then moved some of the pins to get the backing even more flat. I started the quilting part by 'stitching in the ditch' down and across all the panels. I like to start and fasten off by setting the stitch length to 0 then sew a few stitches in the same place. I also leave a tail of thread and, at the end, go through and put a knot in it and pull through wadding layer.